Everyone has a different way of thinking when it comes to moving to a new home. Some may feel that packaging is tiresome, but the thought of unpacking the goods and making the house look better motivates them. Every move is an exhausting experience, and no one expects you to fully unpack the first week in your new home. But, soon you will crave homemade dishes, and an unpacked kitchen is a must for them. The area must be functional, well-organized, and cozy. State to State moving companies will show you a guide to unpacking your kitchen. So let’s get started!

Step 1: Prepare the kitchen first
If you are moving into a new home, or a home where someone lived before, there is always a possibility that it has not been cleaned properly. Everyone has their own way of cleaning and polishing. Especially if you have kids, make sure you go through the kitchen and clean it before putting anything in the cabinets. Focus on the areas where you will store your plates, glasses, dishes. Make sure that the counters and sink are also clean. You will be motivated to organize your kitchen if everything looks spotless.
According to our best cross country movers Texas, organizing the kitchen has probably been something everyone always dreamed about. Refilling your pantry, storing those wine glasses you always loved, putting down your cookbooks, etc. Go around the kitchen. Imagine your daily routine and where do you want items to be located. Once you have an idea in your head, you can move on to the next step.
Step 2: Gather the boxes and start unpacking
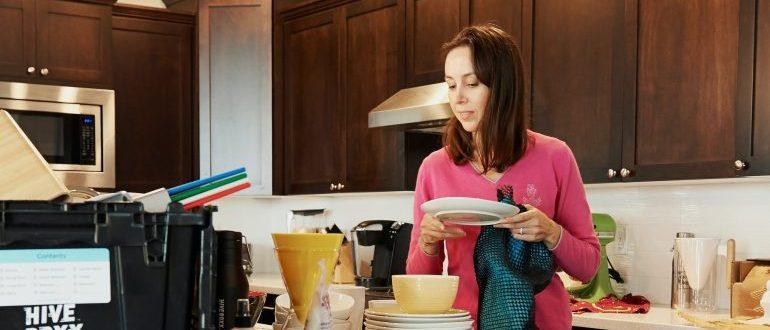
If you’ve labeled each box appropriately, then you should have a very decent notion of what’s inside. If you’re not sure, go through each one and unwrap larger objects to see what you have to sort and organize. It’s critical to do this first to ensure that you won’t have to move an item once you’ve put it in a cabinet or drawer.
First unpack pots, cookers, casseroles, frying pans, and other large items. Then add the finishing touches, such as dishes, bowls, coffee cups, and so on. Everything that you use more regularly strives to be close to your hand so that you can use it.
Next, go with forks, spoons, knives, ladles, wooden spoons, and other small items that are kept in the drawers. Unpack your kitchen quickly and easily, then relax and enjoy it!
Step 3: Organize rarely-used goods
Make a home in your kitchen for everything, including the stuff you don’t use very often. Place all of the items you don’t use very often on the upper shelf. Yes, you’ll need a leader or a chair to get them off the shelves, but this isn’t something you’ll be doing every day. It’s also a better option than setting them down where they could become a hazard for you and your children.
Those dishes and cups that you only use for special dinners can be kept in cabinets and some cupboards that are difficult to reach. Keeping fragile goods in an out-of-the-way location will keep them safe.
Step 4: Organize your pantry next
Organizing the pantry is not a very easy task, and keeping it in order takes the assistance of everyone in the house. It’s crucial to designate a unique area to store all of your canned foods, baking materials, and kitchen appliances. It doesn’t matter if you have a small corner to fill or an entire kitchen closet. Take a look at these pantry organization ideas to gain some inspiration for getting your shelves in order:
- Use containers: to save space, store packaged foods in baskets and containers. Containers made of plastic or glass with bamboo lids are perfect for storing dry foods.
- Label everything: label bins, containers, and shelves so that everyone in your family knows where things are.
- Utilize doors: To make more shelf space in your pantry, hang organizers over the doors. Canned goods, spices, oils, and jars are common there.
- A kid-friendly shelf: fill a bottom shelf with snacks so that kids may be able to grab a snack on their own.

Step 5: If you don’t need it, don’t keep it
Moving from Texas to Maryland was stressful and you brought all those things with you. And you still don’t know where to place them. That might be the sign that you don’t need it anymore. You’ve just moved from place to place because that’s what you’ve always done. So choose carefully the kitchen goods you want and need, and donate the rest or throw them away. Plastic storage container lids without a base, as well as old scratched-up water bottles that are seldom used, can be recycled instead.
Step 6: Reorganize your kitchen if needed
Have you finished following our guide to unpacking your kitchen? Don’t worry if you don’t like your kitchen in the beginning or you are not satisfied at the moment. After a few weeks in your new house, you’ll most likely develop cooking, serving, and eating routine. Once you’ve become used to the procedure, double-check that your initial organization went smoothly. Reorganize your kitchen as needed to make it functional for you and your family.
Conclusion
Relocating is difficult and there are many opportunities to go wrong, but if you approach the unpacking by following our guide to unpacking your kitchen, you can end the journey positively. Remember, unpacking boxes can take a few days, so take some time and enjoy your new home. Chances are that things in your home will change a million times before you find the perfect space or position – and that’s fine. Even if it is not organized exactly as you want, it is a start and can always be reorganized later.


